Microbial Control in Clean rooms and Manufacturing facilities

Microbial control is crucial in clean rooms and manufacturing facilities to prevent contamination and ensure the quality of pharmaceutical products. Here's a detailed overview


Why Microbial Control is Important

1. Product Safety: Microbial contamination can lead to product recalls, harm to patients, and damage to a company's reputation.

2. Regulatory Compliance: Microbial control is a regulatory requirement in pharmaceutical manufacturing, ensuring compliance with guidelines like USP <797>, EU GMP Annex 1, and FDA guidance.

3. Quality Control: Microbial control helps maintain a controlled environment, preventing contamination and ensuring product quality.


Microbial Control Strategies

1.Cleaning and Disinfection: Regular cleaning and disinfection of surfaces, equipment, and personnel to reduce microbial loads.

2.Sanitization: Using sanitizing agents to reduce microbial populations on surfaces and equipment.

3.Sterilization: Using sterilization methods like autoclaving, dry heat, or gamma radiation to eliminate microorganisms.

4.Personnel Hygiene: Ensuring personnel follow proper hygiene practices, including hand washing, gowning, and mask wearing.

5.Environmental Monitoring: Regularly monitoring the environment for microbial contamination using methods like air sampling, surface sampling, and water testing.

6.Heating, Ventilation, and Air Conditioning (HVAC): Designing and maintaining HVAC systems to control temperature, humidity, and air quality.

7.Material Control: Controlling the introduction of materials into the clean room or manufacturing facility to prevent microbial contamination.


Clean Room Design and Operation

1.Layout: Designing the clean room layout to minimize turbulence, reduce airflow, and prevent contamination.

2.Airflow: Maintaining laminar airflow to prevent turbulence and reduce microbial contamination.

3.Pressure: Maintaining a positive pressure differential to prevent contamination from adjacent areas.

4.Temperature and Humidity: Controlling temperature and humidity levels to prevent microbial growth.

5.Lighting: Using appropriate lighting to prevent UV radiation, which can promote microbial growth.


Manufacturing Facility Design and Operation

1.Segregation: Segregating different manufacturing processes to prevent cross-contamination.

2.Material Flow: Controlling material flow to prevent contamination and mix-ups.

3.Equipment Design: Designing equipment to prevent microbial contamination, including easy-to-clean surfaces and minimal crevices.

4.Cleaning and Sanitization: Regularly cleaning and sanitizing equipment and surfaces to reduce microbial loads.


Microbial Monitoring and Control

1.Enironmental Monitoring: Regularly monitoring the environment for microbial contamination.

2.Product Testing: Testing products for microbial contamination.

3.Microbial Identification: Identifying microorganisms isolated from environmental or product testing.

4.Corrective Action: Implementing corrective actions to address microbial contamination, including re-cleaning, re-sanitizing, or re-sterilizing.


Best Practices

1.Develop a Microbial Control Program: Establish a comprehensive microbial control program, including procedures for cleaning, sanitization, and sterilization.

2.Train Personnel: Provide regular training to personnel on microbial control procedures and best practices.

3.Regularly Review and Update Procedures: Regularly review and update microbial control procedures to ensure they remain effective and compliant with regulatory requirements.

4.Continuously Monitor and Improve: Continuously monitor microbial control measures and implement improvements as needed.


By implementing these strategies, clean rooms and manufacturing facilities can maintain a controlled environment, prevent microbial contamination, and ensure the quality of pharmaceutical products.

Microbial Risk assessment in Pharmaceutical production


Microbial risk assessment is a critical component of pharmaceutical production, ensuring the safety and quality of products. 

What is Microbial Risk Assessment?

Microbial risk assessment is a systematic process to identify, evaluate, and control microbial hazards in pharmaceutical production. It involves assessing the likelihood and potential impact of microbial contamination on product quality, safety, and efficacy.


Why is Microbial Risk Assessment Important in Pharmaceutical Production?

1.Product Safety: Microbial contamination can lead to product recalls, harm to patients, and damage to a company's reputation.

2.Regulatory Compliance: Microbial risk assessment is a regulatory requirement in pharmaceutical production, ensuring compliance with guidelines like USP <1071>, EU GMP Annex 1, and FDA guidance.

3.Quality Control: Microbial risk assessment helps identify potential contamination sources, enabling proactive measures to prevent contamination and ensure product quality.


Steps Involved in Microbial Risk Assessment

1. Hazard Identification: Identify potential microbial hazards associated with raw materials, equipment, personnel, and the production environment.

2. Risk Assessment: Evaluate the likelihood and potential impact of each identified hazard on product quality, safety, and efficacy.

3. Risk Mitigation: Implement controls to minimize or eliminate identified risks, such as improving cleaning and sanitization procedures, enhancing personnel training, or modifying equipment design.

4. Risk Verification: Monitor and verify the effectiveness of implemented controls, making adjustments as needed.

5. Risk Review: Periodically review and update the microbial risk assessment to ensure it remains relevant and effective.


Factors to Consider in Microbial Risk Assessment

1. Raw Materials: Evaluate the microbial quality of raw materials, including active pharmaceutical ingredients (APIs), excipients, and packaging materials.

2. Equipment and Facilities: Assess the design, maintenance, and cleaning of equipment and facilities to identify potential contamination sources.

3. Personnel: Consider personnel training, hygiene practices, and potential for contamination introduction.

4. Production Processes: Evaluate production processes, including handling, storage, and transportation of materials and products.

5. Environmental Factors: Consider environmental factors like temperature, humidity, and air quality, which can impact microbial growth and contamination.


Tools and Techniques for Microbial Risk Assessment

1. Failure Mode and Effects Analysis (FMEA): A systematic approach to identify and evaluate potential failure modes.

2. Hazard Analysis and Critical Control Points (HACCP): A methodology to identify and control hazards in the production process.

3. Microbial Testing: Conducting microbial tests, such as bioburden testing, to detect and quantify microorganisms.

4. Risk Matrices: Using risk matrices to evaluate and prioritize identified risks.


Best Practices for Microbial Risk Assessment

1. Multidisciplinary Approach: Involve a team of experts from various departments, including quality, production, and microbiology.

2. Regular Review and Update: Periodically review and update the microbial risk assessment to ensure it remains relevant and effective.

3. Documentation and Record-Keeping: Maintain accurate and detailed records of the microbial risk assessment, including identified risks, controls, and verification activities.

4. Training and Awareness: Ensure personnel involved in pharmaceutical production understand the importance of microbial risk assessment and their role in controlling microbial hazards.


By following these best practices and using the tools and techniques outlined above, pharmaceutical manufacturers can ensure a robust microbial risk assessment process that protects product quality, safety, and efficacy.

Why Epoxy Flooring is Preferred in the Pharmaceutical Industry


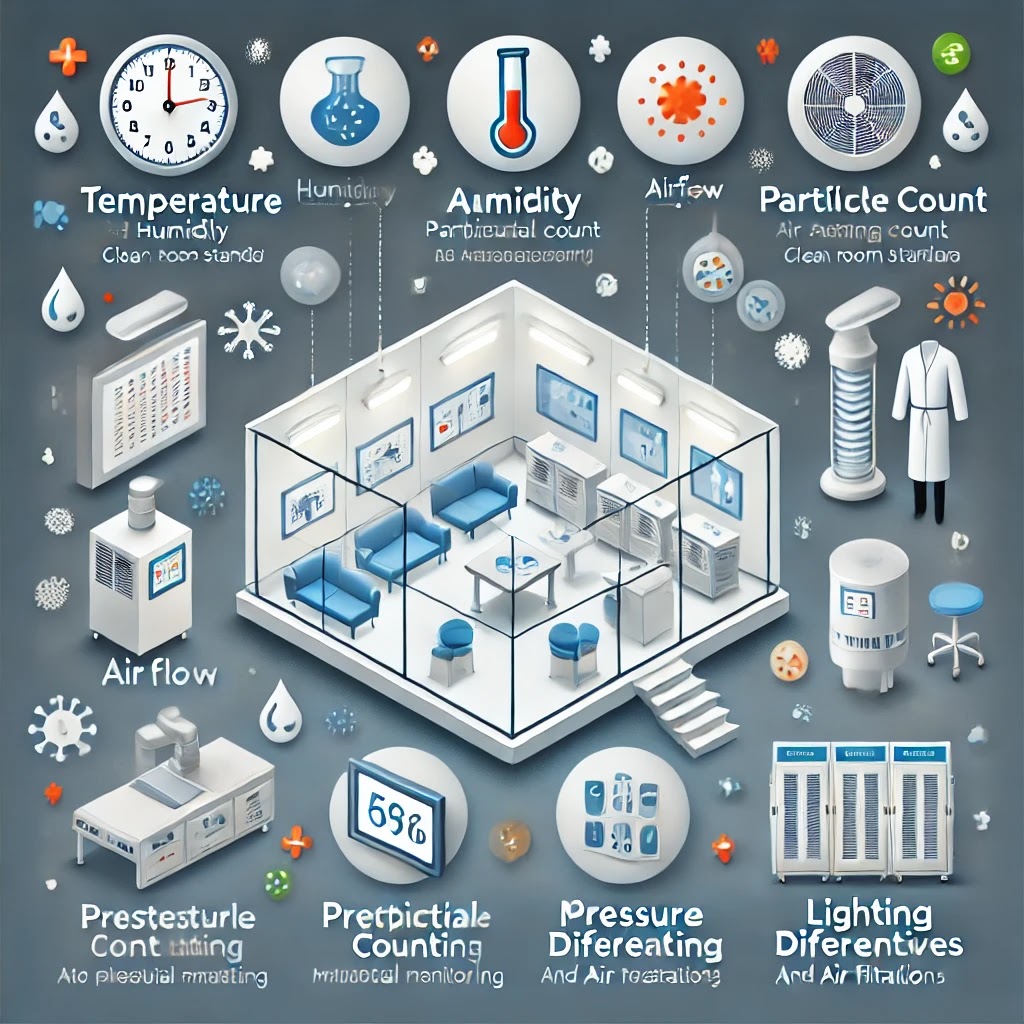
Maintaining a controlled, contamination-free environment is crucial for pharmaceutical manufacturing. Cleanrooms must meet stringent standards for hygiene, safety, and operational efficiency. Epoxy flooring has become the preferred choice in these environments due to its superior properties compared to other flooring materials like tiles, vinyl, or polyurethane.


This article explores why the pharmaceutical industry relies on epoxy flooring, the guidelines followed, and the numerous benefits it offers.


1. Key Reasons for Using Epoxy Flooring

a) Seamless and Hygienic Surface

Epoxy flooring creates a smooth, continuous surface without joints or grout lines where bacteria, dust, or contaminants could accumulate. This seamless finish makes cleaning and sanitizing easier and more effective, a critical factor in maintaining a sterile environment.

b) Chemical Resistance

Pharmaceutical operations often involve the use of strong chemicals and solvents during manufacturing and cleaning. Epoxy coatings are highly resistant to these substances, preventing damage to the flooring and ensuring long-lasting durability.

c) Mechanical Strength and Durability

With the constant movement of personnel, equipment, and heavy machinery in cleanrooms, flooring must withstand mechanical stress. Epoxy coatings have high compressive and tensile strength, making them resistant to wear and tear from foot traffic and equipment movement.

d) Moisture and Water Resistance

Epoxy flooring is non-porous, preventing water and moisture ingress that could lead to microbial growth. This moisture resistance helps maintain a dry and controlled environment necessary for pharmaceutical processes.

e) Anti-Slip and Anti-Static Properties

Safety is a priority in pharmaceutical facilities. Epoxy flooring can be customized with anti-slip finishes to reduce accident risks. In environments handling sensitive electronic equipment, anti-static epoxy coatings are essential to prevent static electricity build-up.


2. Types of Epoxy Flooring for Pharmaceutical Cleanrooms

1. Self-Leveling Epoxy Flooring: Ideal for creating smooth, level surfaces that are easy to clean.

2. Anti-Static Epoxy Flooring: Prevents static charge build-up in sensitive environments.

3. Anti-Microbial Epoxy Flooring: Contains additives to inhibit microbial growth on the floor surface.

4. Decorative Epoxy Coatings: Include colored flakes or quartz for aesthetic and functional purposes.


3. Regulatory Guidelines for Epoxy Flooring in Pharma Cleanrooms

Pharmaceutical companies must comply with strict global regulatory standards to ensure their facilities meet hygiene and safety requirements. Epoxy flooring helps meet these regulations due to its cleanable, durable, and non-contaminating properties. Some key guidelines include:

1. Good Manufacturing Practices (GMP):

Requires floors to be smooth, hard, non-porous, and easy to clean.

Flooring must not release particles that could contaminate products.

2. ISO 14644-1 Cleanroom Standards:

Classifies cleanrooms based on permissible airborne particle levels.

Epoxy flooring helps maintain these cleanliness levels by minimizing dust accumulation.

3. FDA Guidelines:

Recommends surfaces that are easily cleanable and resistant to microbial growth.

4. EU GMP Annex 1:

Emphasizes smooth, impervious surfaces for areas where sterile medicinal products are manufactured.

Flooring must resist chemical cleaning agents and support effective decontamination.


4. Installation Process and Considerations

Epoxy flooring installation for pharmaceutical cleanrooms involves several key steps to ensure compliance and functionality:

1. Surface Preparation:

The existing floor surface is cleaned and prepped to remove dust, grease, or debris.

Mechanical grinding may be used to roughen the surface for better adhesion.

2. Primer Application:

A primer is applied to ensure strong bonding between the base and epoxy layer.

3. Epoxy Layer Application:

The epoxy resin and hardener are mixed and applied as a smooth layer.

Additional layers may be applied for thickness and durability.

4. Finishing Coats:

Optional anti-slip coatings or decorative finishes are applied.

The surface is cured and inspected for quality before use.


5. Benefits of Epoxy Flooring in Pharmaceutical Operations

1. Contamination Control:

Prevents microbial growth by minimizing areas where bacteria can thrive.

2. Enhanced Sterility:

Supports strict microbial control requirements necessary for drug production.

3. Durability and Longevity:

Offers long service life even in demanding environments, reducing repair costs.

4. Cost-Effective:

Minimal maintenance requirements make it a cost-efficient solution over time.

5. Compliance-Friendly:

Helps facilities meet regulatory requirements for hygiene and cleanliness.


6. Comparative Analysis: Epoxy vs. Other Flooring Materials

 A) Epoxy :

 1.Advantages

   Seamless, durable, easy to clean, chemical resistance.

 2. Disadvantages 

    Initial installation cost can be high


B) Vinyl :

 1.Advantages

   Low cost, Moderate durability

2. Disadvantages 

  Seams can harbor bacteria, less durable than expoxy


C) polyurethane 

 1. Advantages

   High flexibility and Chemical resistance 

2. Disadvantages 

   Less wear resistant compare to expoxy


7. Maintenance Tips for Epoxy Flooring

1. Regular Cleaning: Use mild cleaning agents to remove dust and debris without damaging the surface.

2. Avoid Harsh Chemicals: Select cleaning solutions compatible with epoxy to maintain integrity.

3. Inspection: Periodically inspect for cracks or damage to ensure contamination control is maintained.


8. Real-Life Example: Successful Implementation

A leading pharmaceutical company upgraded its clean room flooring to epoxy coatings to address contamination concerns and improve durability. The result was a 20% increase in cleaning efficiency, compliance with GMP requirements, and reduced maintenance downtime.


9. Conclusion

Epoxy flooring is an essential component in pharmaceutical cleanrooms due to its seamless, durable, and contamination-resistant properties. By adhering to stringent regulatory guidelines and offering numerous operational benefits, epoxy coatings play a critical role in ensuring product safety and manufacturing efficiency.

Basic Microbiological Techniques


1. Streak Plate Method

Objective: Isolate pure bacterial colonies from a mixed culture.

Materials Needed:

*Sterile nutrient agar plates.

*Inoculating loop.

*Bunsen burner.

*Bacterial culture.

Steps:

1. Sterilize the inoculating loop in a flame and let it cool.

2. Dip the loop into the bacterial culture.

3. Streak the loop gently across one quadrant of the agar plate.

4. Sterilize the loop, cool it, and streak the second quadrant by dragging from the first.

5. Repeat for the remaining quadrants.

6. Incubate the plate at 37°C for 24–48 hours.

Expected Result: Isolated colonies in the final quadrant.

Tips:

Avoid cutting the agar surface while streaking.

Ensure proper sterilization to prevent contamination.


2. Serial Dilution and Plating

Objective: Determine microbial load in a sample.

Materials Needed:

*Sterile test tubes with diluent (e.g., saline).

*Micropipette.

*Agar plates.

*Sample solution.

Steps:

1. Add 9 mL of diluent to each test tube.

2. Add 1 mL of the sample to the first tube and mix (10^-1 dilution).

3. Transfer 1 mL from the first tube to the second and mix (10^-2 dilution). Repeat for subsequent tubes.

4. Plate 0.1 mL from each dilution onto sterile agar plates.

5. Spread the sample using a sterile spreader.

6. Incubate at 37°C for 24–48 hours.

Expected Result: Countable colonies (30–300 CFUs) at a specific dilution.

Tips:

Use a vortex mixer for thorough mixing.

Always change pipette tips between dilutions.


3. Gram Staining

Objective: Differentiate bacteria into Gram-positive and Gram-negative groups.

Materials Needed:

*Gram stain reagents (crystal violet, iodine, alcohol, safranin).

*Microscope slides.

*Bacterial smear.

Steps:

1. Prepare a bacterial smear on a slide and heat-fix it.

2. Flood the slide with crystal violet for 1 minute.

3. Rinse with water and add iodine solution for 1 minute.

4. Decolorize with alcohol for 10–15 seconds and rinse.

5. Counterstain with safranin for 1 minute.

6. Rinse, blot dry, and observe under a microscope.

Expected Result:

Gram-positive: Purple.

Gram-negative: Pink.

Tips:

Do not over-decolorize.

Use fresh reagents for better results.


4. Pour Plate Method

Objective: Estimate microbial count by mixing samples with molten agar.

Materials Needed:

*Molten agar.

*Diluted microbial sample.

*Sterile petri dishes.

Steps:

1. Pipette 1 mL of the diluted sample into a sterile petri dish.

2. Pour molten agar (~45°C) into the dish.

3. Swirl gently to mix.

4. Let it solidify, then incubate at 37°C.

Expected Result

Colonies grow both within and on the agar surface.

Tips:

Avoid overheating the agar; it can kill microorganisms.

Ensure uniform mixing to avoid uneven colony distribution.

Cleanroom Classification in the Pharmaceutical Industry


Cleanrooms are critical environments in pharmaceutical manufacturing where contamination must be controlled to ensure product safety and efficacy. Clean room classifications are based on the allowable concentration of airborne particles and microorganisms, defined by international standards like ISO 14644 and Good Manufacturing Practices (GMP).


1. Importance of Clean room Classification

Product Safety: Ensures that sterile drugs and medical devices remain uncontaminated.

Regulatory Compliance: Meets the stringent requirements of authorities like FDA, EMA, and WHO.

Process Efficiency: Reduces the risk of batch failures due to contamination.


2. Standards for Clean room Classification


ISO 14644-1 Standard

Defines clean room classes based on particle count per cubic meter of air.

ISO 5:

Particles ≥0.5µm (per m³) - 3,520

Applications - Aseptic filling of sterile products 


ISO 6:

Particles ≥0.5µm (per m³) - 35,200

Applications - Critical support zone


ISO 7:

Particles ≥0.5µm (per m³) - 352,000

Applications - Background for ISO 5 Operations


ISO 8:

Particles ≥0.5µm (per m³) - 3,520,000

Applications - Non critical support areas


EU GMP Annex 1

Specifies cleanroom grades (A, B, C, and D) for sterile pharmaceutical production, focusing on particle and microbial limits.

Grade A:

At rest (Particles ≥0.5µm) - 3,520

In operation (Particles ≥0.5µm) - 3,520

Microbial Limits (CFU/m³) - 0


Grade B:

At rest (Particles ≥0.5µm) - 3,520

In operation (Particles ≥0.5µm) - 3,52,000

Microbial Limits (CFU/m³) - 10


Grade C:

At rest (Particles ≥0.5µm) - 3,52,000

In operation (Particles ≥0.5µm) - 3,520,000

Microbial Limits (CFU/m³) - 100


Grade D:

At rest (Particles ≥0.5µm) - 3,520,000

In operation (Particles ≥0.5µm) - not defined

Microbial Limits (CFU/m³) - 200


Grade A: Used for high-risk operations like aseptic filling.

Grade B: Background environment for Grade A zones.

Grade C/D: Lower cleanliness levels for less critical processes.


3. Parameters for Clean room Classification

1. Particulate Control

Monitored using laser particle counters.

Critical during operations to detect airborne contamination.


2. Microbial Control

Settle Plates: Monitor microbial load in the air.

Contact Plates/Swabs: Test surfaces and personnel for contamination.


3. Airflow and Pressure Control

Laminar Airflow (LAF): Ensures unidirectional air movement in critical zones.

Pressure Differentials: Positive pressure prevents contaminants from entering clean zones.


4. Clean room Design and Maintenance

Design Features

HEPA Filters: Remove ≥99.97% of particles ≥0.3 µm.

Smooth Surfaces: Minimize particle accumulation.

Airlocks: Prevent cross-contamination during personnel or material transfer.


Maintenance Practices

Routine Cleaning: Use of validated disinfectants like IPA and sporicides.

Periodic Testing: HEPA filter integrity, airflow velocity, and particle counts.

Personnel Training: Emphasizes proper gowning and aseptic techniques.


5. Challenges in Maintaining Clean room Standard:

Cost: Implementing and maintaining advanced cleanrooms is expensive.

Operator Compliance: Ensuring personnel adhere to strict protocols.

Evolving Standards: Staying updated with new regulations and technologies.


6. Future Trends in Clean room Classification

Real-Time Monitoring: Continuous particle and microbial monitoring systems.

Sustainable Cleanrooms: Energy-efficient HVAC systems and eco-friendly materials.

Automation: Robots for aseptic operations to reduce human error.


Conclusion

Clean room classifications play a pivotal role in maintaining the safety and sterility of pharmaceutical products. By adhering to ISO 14644 and GMP standards, manufacturers can ensure compliance, product quality, and patient safety.

Gowning Qualification in Sterile Areas: Importance and Requirements


Gowning qualification is a crucial process in pharmaceutical manufacturing, particularly in sterile areas, as it directly impacts the safety, quality, and integrity of sterile products. The process ensures that personnel adhere to stringent hygiene standards to avoid contamination in environments where products such as injectables, biologics, or sterile medical devices are manufactured. Proper gowning is a critical component of Good Manufacturing Practice (GMP) guidelines, which govern pharmaceutical and healthcare manufacturing.

1. Purpose of Gowning Qualification

Preventing Contamination: Sterile areas are highly sensitive environments where even the smallest microbial or particulate contamination can compromise the sterility of the product. Gowning qualification ensures that personnel do not introduce contaminants when entering these areas.


Ensuring Compliance with Regulatory Standards: Regulatory authorities like the FDA, EMA, and WHO mandate stringent gowning and hygiene practices in sterile manufacturing environments to maintain product quality and patient safety.


Protecting Product Integrity: Sterile products, such as parenteral drugs and surgical instruments, are designed to be free from any microbial contaminants. Proper gowning prevents the introduction of bacteria, fungi, or other harmful microorganisms that could lead to infections when the products are used by patients.


Maintaining Cleanroom Classifications: Cleanrooms in pharmaceutical manufacturing are classified based on their level of cleanliness (e.g., ISO 5, ISO 7, ISO 8). The gowning qualification process ensures that personnel do not inadvertently compromise these classifications by introducing contaminants.


2. Steps in Gowning Qualification

Gowning qualification is a formal process that involves training, evaluation, and validation to ensure that personnel meet specific gowning requirements for sterile areas.

a. Gowning Procedures

Hand Hygiene: Proper handwashing and sanitization are the first steps before gowning. Personnel must wash their hands thoroughly to remove dirt and microorganisms before donning any protective clothing.

Donning the Gowning Apparel: Gowning procedures are usually performed in a specific sequence, typically starting with the use of sterile gloves, followed by the gown, head covers, shoe covers, and face masks. The protective attire must be donned in a clean area, often referred to as the “gowning room.”

Use of PPE (Personal Protective Equipment): Appropriate PPE includes sterile gloves, gowns, shoe covers, hair covers, face masks, and in some cases, face shields or goggles, depending on the specific environment.

Proper Technique: Personnel must be trained to use the correct technique when putting on and removing protective garments to prevent contamination. For example, gloves must be put on after the gown to avoid contamination from the gloves during the gowning process.


b. Training and Qualification

Training Programs: Employees must undergo regular training to understand the importance of gowning, the appropriate techniques for gowning, and how to avoid contamination. They should also be familiar with the gowning protocols specific to the cleanroom classification they are working in.

Simulated Gowning: Gowning qualification often involves simulated gowning exercises where employees must demonstrate their ability to follow the gowning procedure correctly under controlled conditions. These simulations may be observed by a qualified trainer to ensure the process is followed without mistakes.

Evaluation and Assessment: After gowning training, employees are often evaluated through practical tests, gowning audits, and assessments. Their ability to follow the procedure correctly is checked to ensure they meet the standards required for sterile areas.


c. Monitoring and Documentation

Ongoing Monitoring: Gowning qualification is not a one-time process. Employees must be routinely observed to ensure they follow proper gowning protocols during work shifts. Monitoring may also include inspecting the quality and integrity of protective clothing to ensure they remain free from defects.

Documentation: All gowning qualification activities must be well-documented as part of GMP requirements. Records of training, assessments, and periodic audits should be maintained for compliance and traceability.


3. Importance of Gowning Qualification in Sterile Areas

a. Microbial Contamination Control

Gowning acts as a barrier to prevent the introduction of microorganisms into the sterile environment. Human beings are a common source of contamination due to skin shedding (which contains bacteria and fungi), hair, respiratory droplets, and sweat. Proper gowning ensures that:

Hair and skin are fully covered, preventing the release of shedding skin cells and hair into the cleanroom.

Breathing zones are protected with face masks or respirators to limit the risk of introducing microorganisms through respiratory droplets.

Hands and arms are covered to minimize the risk of transferring contamination from the body to the product or surfaces.


b. Protecting the Sterility of Pharmaceutical Products

In pharmaceutical manufacturing, especially for products that will be administered via injection, sterility is paramount. Any contamination in the sterile environment can lead to the growth of microorganisms, jeopardizing product quality and patient safety. Proper gowning helps protect:

The drug’s sterility by preventing contamination during the manufacturing and packaging process.

The equipment used in sterile processing, as contamination from personnel can accumulate on surfaces and lead to product failure or infection.


c. Reducing the Risk of Cross-Contamination

Cross-contamination occurs when materials from one product or batch contaminate another product or batch. Gowning qualification ensures that the risk of transferring contaminants from one product or area to another is minimized, maintaining product integrity and compliance with regulatory standards.


d. Maintaining Cleanroom Integrity

Cleanrooms are controlled environments with strict guidelines on air quality, temperature, humidity, and particulate matter. Gowning qualifications contribute to maintaining cleanroom classifications, ensuring that air quality remains uncontaminated by particulates or microorganisms introduced by personnel. Without proper gowning, the air quality in the cleanroom could deteriorate, affecting not just one batch but potentially multiple production cycles.


4. Challenges and Best Practices

Gowning Failures: Incorrect gowning, such as not covering all skin or contamination during the gowning process, can lead to serious issues. A common challenge is improper gowning in a rush or failure to wear all required garments.

Requalification: Personnel should undergo periodic requalification to ensure their gowning skills and knowledge are up to date. Regular training sessions, refresher courses, and recertification can help ensure compliance.

Continuous Monitoring: Monitoring the gowning process and ensuring adherence to protocols is essential to maintaining the sterility of pharmaceutical manufacturing areas.


Conclusion

Gowning qualification is essential for maintaining sterility in pharmaceutical manufacturing environments, particularly in sterile areas where the quality and safety of the product must not be compromised. Proper gowning procedures, regular training, and ongoing monitoring ensure that personnel do not introduce harmful contaminants to the environment, thus protecting the integrity of the manufacturing process and safeguarding public health. It is a fundamental part of GMP compliance, ensuring that the pharmaceutical products are of the highest quality and free from contamination.

Key Parameters for Maintaining Clean Room Standards in the Pharmaceutical Industry


Maintaining a controlled or clean room in the pharmaceutical industry is crucial for ensuring product quality and safety. The cleanliness and environmental conditions must be strictly controlled to avoid contamination and maintain product integrity. Here are the key parameters required to maintain a clean room, along with the typical ranges for each parameter:


1. Temperature:

Importance: Temperature control is essential to prevent microbial growth, product degradation, and maintain the stability of the pharmaceutical products.

Range: Typically, clean rooms are maintained within the range of 18°C to 22°C (64°F to 72°F). However, specific areas or processes may require different temperature ranges depending on the product being manufactured.

Monitoring: Continuous monitoring systems with alarms are used to alert operators in case the temperature deviates from the acceptable range.


2. Humidity:

Importance: Humidity control is important to avoid condensation, static electricity buildup, and microbial growth. It also helps to prevent issues such as powder caking or moisture absorption in pharmaceutical products.

Range: The standard range for relative humidity in a clean room is 30% to 60%.

Monitoring: Humidity is continuously monitored, and HVAC (Heating, Ventilation, and Air Conditioning) systems are used to control and maintain the desired levels.


3. Airflow (Air Changes per Hour - ACH):

Importance: Proper airflow is crucial to remove airborne particles, control temperature, and maintain a sterile environment. Airflow should be designed to prevent the spread of contamination, and clean rooms are typically divided into several classes based on their cleanliness levels.

Range: The Air Changes per Hour (ACH) vary depending on the clean room class and its usage:

Class 100 (ISO 5): Minimum of 240 ACH.

Class 1000 (ISO 6): Minimum of 150 ACH.

Class 10000 (ISO 7): Minimum of 60 ACH.


Monitoring: The air quality is maintained using High-Efficiency Particulate Air (HEPA) filters, and airflow patterns are carefully designed to minimize dead zones and contamination.


4. Particulate Count:

Importance: The cleanliness of the air is monitored to ensure that airborne particles do not contaminate the product. The level of particulates in the air is classified into different ISO classes, with Class 100 being the cleanest.

Range: The particulate count for different classes is measured in particles per cubic meter at specific particle sizes (e.g., 0.5 microns and above):

Class 100 (ISO 5): Not exceeding 100 particles/m³ (0.5 microns).

Class 1000 (ISO 6): Not exceeding 1,000 particles/m³ (0.5 microns).

Class 10000 (ISO 7): Not exceeding 10,000 particles/m³ (0.5 microns).


5. Pressure Differentials:

Importance: Pressure differentials ensure that airflow moves in the right direction, from clean areas to less clean areas, to avoid contamination spread. Maintaining pressure differences between clean and adjacent areas prevents air from flowing out of the clean areas into surrounding zones.

Range: The pressure differential between rooms is usually maintained at a range of 5-15 Pa (Pascal), with a positive pressure in clean areas and a negative pressure in areas where contamination must be controlled (such as washrooms or waste disposal rooms).

Monitoring: Pressure monitoring devices are installed to continuously track the pressure differential.


6. Microbial Monitoring:

Importance: Microbial contamination can directly affect the product quality, so regular monitoring of microbial contamination in air, surfaces, and equipment is crucial.

Range: The acceptable microbial levels vary by clean room classification:

Class 100 (ISO 5): No microbial growth in settled air or on surfaces.

Class 1000 (ISO 6): Limited microbial growth allowed.

Class 10000 (ISO 7): Higher levels of microbial growth may be acceptable but should still be controlled and monitored regularly.


7. Lighting:

Importance: Proper lighting ensures that all processes are carried out under clear visibility while also considering the risks of contamination from light sources.

Range: Lighting levels typically range from 300 to 1000 lux depending on the specific tasks being performed in the clean room.

Monitoring: Light intensity is measured periodically to ensure it is within the required limits.


8. Air Filtration:

Importance: The air filtration system plays a crucial role in controlling airborne contaminants. Clean rooms are equipped with HEPA or ULPA filters to ensure that the air is free from particles.

Range: The HEPA filters remove particles as small as 0.3 microns, with an efficiency of at least 99.97%. For even more stringent conditions, ULPA filters can be used, which are 99.999% efficient at removing particles as small as 0.12 microns.

Monitoring: Filters must be regularly tested for efficiency and replaced as needed.


9. Clean Room Gowning:

Importance: To prevent contamination from operators and their clothing, strict gowning protocols must be followed, including wearing gloves, gowns, face masks, shoe covers, and sometimes respirators.

Range: The gowning standards vary based on the clean room classification, with more stringent requirements for higher-class rooms (e.g., wearing coveralls and gloves in Class 100 areas).


10. Ventilation and HVAC Systems:

Importance: The HVAC system plays a central role in maintaining temperature, humidity, airflow, and air filtration.

Range: HVAC systems must be designed to meet the air change rate required for the specific clean room classification, along with maintaining stable temperature and humidity conditions.


11. Lighting and Environmental Monitoring Equipment:

Importance: Continuous monitoring and real-time data collection of the environment ensure that the conditions are stable. Equipment like temperature/humidity monitors, particle counters, pressure sensors, and airflow meters should be calibrated and maintained regularly.


Conclusion: 

Maintaining a controlled or clean room in the pharmaceutical industry requires careful monitoring and control of several environmental parameters, including temperature, humidity, airflow, particulate counts, pressure differentials, microbial contamination, and more. Adhering to these parameters ensures that the product remains free from contamination, safeguarding both the product and public health. Regular calibration and maintenance of the monitoring systems are crucial to ensure compliance with industry standards like ISO, GMP (Good Manufacturing Practices), and FDA guidelines.


Importance of Environmental Monitoring in Pharma Industry


Environmental Monitoring (EM) is a critical aspect of pharmaceutical manufacturing to ensure the production of safe and effective medicines. It focuses on maintaining and monitoring controlled environments, such as clean rooms, to prevent contamination.


1. Ensures Product Quality

Pharmaceutical products, especially sterile drugs, are highly susceptible to contamination by microbes, particulates, and chemicals.

EM helps in maintaining the integrity and quality of products by ensuring compliance with clean room standards.


2. Regulatory Compliance

Regulatory bodies like the FDA, EMA, and WHO require stringent EM protocols to meet Good Manufacturing Practices (GMP).

Regular EM data serves as documented evidence of a controlled manufacturing environment during audits and inspections.


3. Protection Against Contamination

Contamination can occur through air, surfaces, equipment, personnel, or water.

Monitoring helps in identifying potential contamination sources and implementing corrective actions promptly.


4. Risk Management

EM provides real-time data to assess risks in clean rooms and other controlled areas.

Risk-based monitoring helps prioritize high-risk zones and implement targeted cleaning and sanitization strategies.


5. Enhances Sterility Assurance

For sterile products, sterility is paramount. EM ensures that environmental conditions remain within permissible limits throughout production.

This minimizes batch failures and product recalls.


6. Supports Continuous Improvement

Trend analysis of EM data helps in identifying patterns and predicting potential deviations.

Continuous improvement reduces variability and strengthens contamination control strategies.


7. Personnel Monitoring and Training

EM includes monitoring personnel to ensure they follow proper gowning, hygiene, and handling protocols.

Regular monitoring and feedback improve adherence to aseptic techniques.


8. Supports Utility Monitoring

EM extends to utilities like water, compressed air, and gas systems.

Regular sampling and testing ensure these utilities remain contamination-free and meet quality standards.


Key Elements of EM in Pharma

1. Air Quality Monitoring

Tests for microbial and particulate contamination in air.

Methods: Settle plates, active air sampling, and particle counters.


2. Surface Monitoring

Checks for microbial load on equipment, walls, and floors.

Methods: Swab tests and contact plates.


3. Personnel Monitoring

Evaluates contamination risks posed by operators.

Focuses on gown integrity, gloves, and exposed areas like forearms.


4. Water and Utility Monitoring

Ensures RO/DI water meets microbiological standards.

Prevents biofilm formation in pipelines and tanks.


Common Challenges in EM

1)Identifying root causes of contamination.

2)Ensuring proper calibration of monitoring equipment.

3)Balancing production schedules with regular monitoring tasks.


Conclusion

Environmental Monitoring is the backbone of contamination control in pharmaceutical manufacturing. By maintaining a consistent focus on EM, companies not only comply with regulations but also protect patient safety and uphold product quality.

Environmental monitoring (EM) in clean rooms


Environmental Monitoring (EM) in cleanrooms involves the routine sampling, testing, and analysis of the environment to detect microbial and particulate contamination. This ensures that cleanrooms meet strict regulatory standards required for the production of sterile pharmaceutical products.


Key Components of Environmental Monitoring

1. Microbial Monitoring

A)Airborne Microorganisms: Assessed using air sampler or settle plates to detect viable particles.

B)Surface Monitoring: Swab tests or contact plates used to evaluate microbial contamination on equipment, walls, or floors.

C)Personnel Monitoring: Sampling gloves, gowns, and body surfaces to ensure personnel hygiene.


2. Particulate Monitoring

Non-Viable Particles: Monitored using particle counters to measure airborne particles that could harbor microorganisms.


3. Utility Monitoring

Compressed Gases: Checking for microbial and particulate contamination.

Water Systems: Testing purified water, water for injection (WFI), and other utility systems.


4. Temperature and Humidity Monitoring

Ensures the clean room environment remains within acceptable ranges, critical for microbial growth control.


Steps in Environmental Monitoring

1. Risk Assessment

Identify critical zones (e.g., aseptic areas) where monitoring is essential.

2. Sample Collection

Use specified methods such as settle plates, swabs, or air sampler to collect samples.

3. Incubation and Analysis

Incubate samples under specified conditions to promote microbial growth.

Analyze for microbial load and identify the contaminants using systems like Vitek 2 Compact.

4. Trending and Data Analysis

Regularly review data to identify trends and potential deviations.

Set action and alert limits for microbial counts.

5. Corrective Actions

Investigate deviations and implement corrective and preventive actions (CAPA).


Importance of Environmental Monitoring

1. Ensures Product Sterility

Critical for sterile pharmaceutical manufacturing, where even minor contamination can compromise product safety.

2. Regulatory Compliance

Adherence to standards set by regulatory authorities like the FDA, EMA, or WHO.

Ensures compliance with ISO 14644 for cleanroom classification.

3. Protects Patient Safety

Prevents contamination of sterile drugs, safeguarding patients from infections and adverse events.

4. Monitors Cleanroom Performance

Validates the effectiveness of cleaning and disinfection procedures.

Confirms that HVAC systems and HEPA filters maintain desired conditions.

5. Identifies Contamination Sources

Pinpoints microbial hotspots, allowing for targeted interventions.

6. Facilitates Continuous Improvement

Provides data for process improvement and reduces the risk of product recalls.


Common Clean room Contaminants

Bacteria: Staphylococcus, Bacillus, Pseudomonas species.

Fungi: Aspergillus and Penicillium species.

Particulates: Dust, fibers, and skin cells.


Regulatory Guidelines for Environmental Monitoring

FDA: Focus on sterile product manufacturing with specific microbial limits.

EU GMP Annex 1: Guidelines for manufacturing sterile medicinal products.

ISO 14644: Classification of clean room air cleanliness.


Key Instruments and Tools

Air Samplers: Collect air samples for microbial testing.

Settle Plates: Passive method for microbial collection over time.

Particle Counters: Measure non-viable particulates.

Vitek 2 Compact: Automated system for microbial identification.

Contact Plates: For surface sampling in critical zones.


Challenges in Environmental Monitoring

Detecting low levels of contamination in high-grade cleanrooms.

Ensuring consistent training for personnel on EM procedures.

Managing deviations and CAPA effectively.


Conclusion

Environmental Monitoring is indispensable in maintaining the integrity of cleanrooms and ensuring product safety in pharmaceutical manufacturing. By implementing a robust EM program, organizations can meet regulatory requirements, minimize contamination risks, and deliver safe, high-quality products to patients.

Ensuring the Presence of Anaerobic Bacteria in Cleanrooms


Monitoring anaerobic bacteria in cleanrooms is crucial as they can compromise product sterility, especially in pharmaceutical manufacturing. Since anaerobes require oxygen-deprived environments to grow, specific methods and tools are used for their detection.


1. Sampling for Anaerobes in Cleanrooms

a) Air Sampling

Use anaerobic-compatible settle plates (pre-reduced anaerobic agar) in areas prone to contamination.

b) Surface Sampling

Swab samples are collected using sterile swabs, which are immediately placed in anaerobic transport media to preserve viability.

RODAC plates with anaerobic-specific agar can also be used.

c) Personnel Monitoring

Collect samples from gloves or garments using anaerobic media to check contamination sources from operators.


2. Incubation for Identifying Anaerobic Bacteria

Anaerobes require a specific incubation environment:

a) Anaerobic Incubators

Create an oxygen-free atmosphere by purging oxygen and introducing gases like nitrogen (N₂), hydrogen (H₂), and carbon dioxide (CO₂).

Maintain temperature typically at 35-37°C depending on the organism.

b) Anaerobic Chambers/Glove Boxes

Fully sealed units where culture plates are handled and incubated under oxygen-free conditions.

c) Anaerobic Gas Pack Systems

These are widely used for small-scale anaerobic incubation.


3. How Anaerobic Gas Packs Work

Anaerobic gas packs create an oxygen-free environment in sealed containers or jars.

a) Components of an Anaerobic Gas Pack

Chemical Composition:

1. Sodium borohydride or sodium bicarbonate.

2.Citric acid.

3.Activated carbon.

4.A palladium catalyst for oxygen absorption.


Indicator Strips: Methylene blue or resazurin is used to confirm anaerobic conditions. These strips change color when oxygen is absent (blue to colorless for methylene blue).


b) Working Principle

1. Activation:

The gas pack is placed in an anaerobic jar along with culture plates.

Upon activation, the pack releases hydrogen and carbon dioxide gases.

2. Oxygen Removal:

The hydrogen reacts with oxygen in the presence of the palladium catalyst, forming water and depleting oxygen.

Carbon dioxide maintains a stable anaerobic atmosphere.

3. Sealing:

The jar is sealed to prevent external air from entering.


4. Media for Cultivating Anaerobes

Pre-reduced Anaerobic Agar: Media that is prepared and stored in oxygen-free conditions.

Thioglycollate Broth: Contains reducing agents like thioglycollate to support anaerobic growth.


5. Challenges in Anaerobe Monitoring

Transport: Samples must reach the laboratory quickly to prevent oxygen exposure.

Detection: Anaerobes grow slower than aerobes, requiring prolonged incubation (up to 7 days for some species).

Identification: Automated systems like Vitek 2 Compact or molecular methods like PCR are useful for accurate identification.

Disinfectant Efficacy Testing: A Pillar of Contamination Control


DET is the process of evaluating the effectiveness of disinfectants and sanitizers used in pharmaceutical facilities. It ensures that these agents can effectively eliminate or reduce microbial contamination on surfaces, equipment, and other critical areas.


Purpose of DET in the Pharmaceutical Industry

1. Validation of Cleaning Agents:

Demonstrates that the disinfectants used are effective against a range of microorganisms, including bacteria, fungi, and spores.


2. Compliance with Regulatory Standards:

Regulatory agencies like the FDA, EMA, and WHO require facilities to validate disinfectants as part of their contamination control strategy.


3. Contamination Control:

Helps prevent microbial contamination of pharmaceutical products, ensuring patient safety and product quality.


4. Cleanroom Maintenance:

Ensures that disinfectants used in cleanrooms and other controlled environments maintain sterility and meet defined standards.


Key Aspects of DET

1. Selection of Test Organisms:

Includes standard organisms like Staphylococcus aureus, Pseudomonas aeruginosa, Escherichia coli, Aspergillus brasiliensis, and Candida albicans.

Facility isolates (environmental isolates) are also tested as they represent real-world contaminants.


2. Types of Surfaces Tested:

Includes common surfaces in pharmaceutical facilities such as stainless steel, glass, plastic, and epoxy-coated materials.

The disinfectant must demonstrate effectiveness on all relevant surfaces.


3. Contact Time:

The time required for the disinfectant to exhibit its antimicrobial effect.

Must align with real-world application practices in the facility.


4. Concentration and Dilution:

Tests are conducted at the use concentration to ensure real-world applicability.


5. Neutralization:

After the contact time, neutralizers are used to stop the disinfectant action to avoid overestimation of its efficacy.


Steps in Disinfectant Efficacy Testing

1. Preparation:

Prepare the disinfectant solutions at the working concentrations.

Select test organisms and grow them under controlled conditions.


2. Inoculation:

Apply a known quantity of microorganisms onto the test surface or directly into the disinfectant solution.


3. Application of Disinfectant:

Treat the inoculated surface with the disinfectant for the specified contact time.


4. Neutralization:

Neutralize the disinfectant to stop its action.


5. Incubation and Enumeration:

Incubate the samples to allow surviving microorganisms to grow.

Count the colonies to determine the number of microorganisms killed.


6. Comparison:

Compare results with untreated controls to evaluate the disinfectant’s effectiveness.


Regulatory Requirements for DET

1. FDA Guidelines:

The FDA requires validation of cleaning and disinfection practices under cGMP (current Good Manufacturing Practices).


2. USP <1072>:

Provides guidance on the selection and validation of disinfectants used in cleanrooms and other controlled environments.


3. ISO 14698:

Focuses on biocontamination control in cleanrooms, including disinfection practices.


4. WHO Guidelines:

Emphasizes the importance of regular validation and monitoring of cleaning agents in pharmaceutical manufacturing.


Types of Tests in DET

1. Suspension Tests:

Assess the disinfectant's ability to kill microorganisms in a liquid medium.


2. Surface Efficacy Tests:

Evaluate the disinfectant’s performance on various surfaces.


3. In-Use Testing:

Performed in the actual environment to ensure the disinfectant works under routine conditions.


Challenges in DET

1. Environmental Isolates:

Facility-specific microorganisms may exhibit resistance to disinfectants.


2. Material Compatibility:

Disinfectants can degrade certain surfaces or materials over time.


3. Variability in Conditions:

Real-world factors like temperature, humidity, and surface conditions can affect efficacy.


4. Regulatory Scrutiny:

Regulatory agencies expect thorough validation and documentation.


Importance in the Pharmaceutical Industry

Ensures contamination control and maintains the sterility of products.

Protects patients from microbial contamination risks.

Supports compliance with global regulatory standards.

Provides data for risk assessment and improvement of cleaning protocols.


Conclusion 

By conducting DET, pharmaceutical companies can validate their disinfectants, improve contamination control strategies, and ensure safe, high-quality products for consumers.

Microbial Control in Clean rooms and Manufacturing facilities

Microbial control is crucial in clean rooms and manufacturing facilities to prevent contamination and ensure the quality of pharmaceutical p...